
By A.J. Sobel
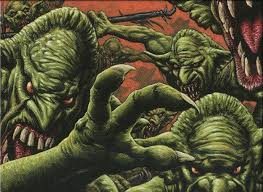
Prossh, Skyraider of Kher

Dragons…they’re powerful, they’re ancient, they’re angry. What’s not to love? Dragon tribal, as a concept, has been around since MTG’s inception. Shivan Dragon is an iconic card, well-loved by old and new players alike.
Unfortunately, until recently they’ve struggled a bit to break into the major leagues. Despite Karrthus, Tyrant of Jund and Scion of the Ur-Dragon being powerful cards, there just wasn’t enough support to give dragons the boost they needed.
With the advent of the Tarkir block, Wizards has finally, and continually, given this most ancient of tribes its time in the limelight.
So why Prossh, a recognized combo commander, instead of Scion of the Ur-Dragon, or simply the Ur-Dragon itself?
The short answer? The land base. Five color decks are difficult to build and balance at a playable level, let alone a competitive one. I simply wasn’t willing to make that kind of monetary investment. Plus, I liked the idea of using the Jund colors to make dragon tribal.
Now, my style of deckbuilding has always been to tinker and optimize a few dollars at a time. If it works, I keep it in, if it doesn’t, it goes in the binder in favor of the next idea. This has led to a build that, while not budget by any means, is also not as optimized as it would be with big money cards (freakin’ Cavern of Souls).
All I ask is that you bear this in mind as you read the list and wonder why the OG duals aren’t in there, or why Doubling Season hasn’t found a home yet. This is simply the most current build I’ve made.
So, with the intro out of the way, let’s get into the deck!
Lands

The most boring, but always the most essential part of any deck are the lands. Coming in at a respectable 37, the current incarnation of the land base has been the result of exhaustive testing.
BASICS:
Forest x5
Mountains x5
Swamp x4
Not much to say here. Basic lands are the bedrock of any deck.
DUAL LANDS:
The scry lands (Temples of Malice, Malady, and Abandon): Holdovers from an earlier version of the deck, they were originally chosen due to their cheap price tag. Though they may be comparatively slow these days, the scry ability is nothing to sneeze at. The obvious upgrades are the Battlebond Lands.
The pain lands (Sulfurous Springs, Llanowar Wastes, and Karplusan Forest): Life is a resource in Commander, and these lands demonstrate that better than anything. Early game, the cost of one life for perfect color fixing is a price well worth paying. In the mid to late game, when you have the colors you need, they simply tap for colorless.
The check lands (Dragonskull Summit, Woodland Cemetery, and Rootbound Crag): Rare is the game when these lands will enter tapped. Though they may not be the most optimal, they are nevertheless excellent value for money (plus, Dragonskull Summit is so on flavor).
The shock lands (Blood Crypt, Overgrown Tomb, and Stomping Ground): What can be said about these lands that hasn’t been said to death? They may be expensive, but they are a force multiplier in any deck they appear in. Bite the bullet and get them.
The fetch lands (Bloodstained Mire, Verdant Catacombs, Wooded Foothills): Personally, I can’t stand how good these lands are. Simply because of their cost, they were one of the last upgrades I made. That said, the first time I ran a Bloodstained Mire into a Stomping Ground for a turn one Llanowar Elves, I figured out what all the fuss was about. Though they are perfectly acceptable to forego, the fetch lands make every game run that much smoother.
TRI-LANDS:

Darigaaz’s Caldera: First on the chopping block if Wizards releases a Jund Triome, it still enters untapped, and fixes your mana perfectly.
Savage Lands: What better way to play a Jund deck than with the incarnation of that shard given form? Though it does fix mana, it is unfortunately slow and will be replaced should a better option become available.
Command Tower: For obvious reasons. Buy one today!
UTILITY LANDS:
Haven of the Spirit Dragon: Flavor Town! Comes in untapped, provides fuel to cast your babies, and gives you a panic button that lets you recur one of said babies. Haven’s utility in this build cannot be overstated.
Fabled Passage: Fast becoming a Commander all-star, Fabled Passage is a strictly better Evolving Wilds/Terramorphic Expanse.
Kessig Wolf Run: While it is somewhat outclassed these days, its underdog status renders it a slept-on card that should not be slept-on. Many is the game that has been closed out by this little land’s ability.
Westvale Abbey: Granted, it’s out of left field, but it is a panic button that has snatched many games from the jaws of defeat.
Bojuka Bog: For those pesky reanimator decks.
Rocks and Ramp

If you’re in green, you’re ramping. Period. As for mana rocks… well, they’re just good.
LAND RAMP:
Rampant Growth: Namesake of the archetype; pay two, get one. ‘Nuff said.
Farseek: Grabs you a shock for when you need your color fix.
Three Visits: Recently reprinted, this little baby gets your Stomping Ground or Overgrown Tomb when you need it the most.
Cultivate/Kodama’s Reach: A little boring, I know, but they’re staples for a reason.
Growth Spasm: Unorthodox, I’ll grant you. On the expensive side for only grabbing one land. But that little Eldrazi (I’ve named him Tim, by the way) has come in clutch in more games than I’d like to admit.
Explosive Vegetation: Mana intensive by today’s standards, this card could easily be swapped out for a Harrow. Regardless, I’ve got a soft spot in my heart for it, which means it’ll probably stick around much longer than it should.
MANA ROCKS:
Sol Ring: I resisted the temptation for as long as I could… but it’s just too damned good not to include.
The Signets (Rakdos, Golgari, and Gruul): Color fixing and ramp; the classics never go out of style.
Arcane Signet (Honorable Mention): I’m sure it’ll worm its way in at some point. It just hasn’t yet.
Instants and Sorceries
Doing everything from drawing cards to pulling a creature out of the graveyard, the sky’s the limit with what you include here. That said, I’ll try to keep this section as coherent as possible.

INSTANTS:
As hard as it is to hold up mana when Atarka, World Render is begging to be cast, doing so just might save your life, or give you that clutch draw you needed.
Nature’s Claim: Though Krosan Grip can’t be countered, this little one drop lowers the curve enough that it makes it all worthwhile.
Assassin’s Trophy: Expensive? Yes. Worth it? Hell yes. There’s nothing like surveying a full battlefield and knowing that you can remove any threat you see at any time you want, for only two mana. In a pinch, you can even blow up a kobold if you’re hard up for lands.
Beast Within: A more mana intensive Assassin’s Trophy with a different downside.
Hunter’s Insight: With the sheer weight of combat damage you’re bringing to bear, it’s likely that you’ll draw upwards of fifteen cards for a simple three mana investment.
Heroic Intervention: Wrath of God? Okay. Damnation? That’s fine. Blasphemous Act? You go right ahead. For two mana, the only thing a board wipe does is bring a smile to your face. Though I will admit that it’s a major “feels bad” when you’re forced to pop it against targeted removal.
SORCERIES:

You may not be able to play them whenever you want, but that’s okay. The power they contain justifies their lack of speed.
Descent of the Dragons: So on-flavor it hurts. For six mana, you can wipe out every single threatening creature on the field, with the bonus that those squishy little kobolds can become flying 4/4s and wreck face with the best of them. More often than not, once this spell resolves, I find I’ve destroyed more of my own creatures than my opponents’.
Crux of Fate: Perfect for dragon tribal — you can sacrifice everything on your side of the field to Prossh and clear the way for massive (often lethal) damage.
Mogg Infestation: In the same vein as Descent of the Dragons, you can wipe your side of the field or an opponent’s. Useless goblins for them, or a delightful snack to fuel your dragons.
Reanimate: In most games, you’ll be the most obvious threat at the table. A few key recursion pieces are essential to keep the tide in your favor. A one-drop spell that can bring back literally any creature fits the bill nicely.
Victimize: Underrated and underplayed, Victimize sacrifices a 0/1 kobold to haul out two of your toughest baddies from the graveyard.
Shamanic Revelation: With the number of tokens this deck can accumulate, drawing ten, eleven, even twelve cards is not out of reach. Paired with a Descent of the Dragons, it can even push your life higher than its starting total.
Read the Bones: Scry away those lands on top and draw two for your trouble. All for three mana? Rather good if you ask me.
Maelstrom Pulse: Not as popular as it once was, nor leveraged to its fullest in Commander, it nevertheless provides targeted removal to any threat on the battlefield.
Decimate: Mid to late game, this card can set everybody back a bit, or annihilate a single player. Incredibly useful, and under-appreciated.
Eldritch Evolution: Whether you just want a beat stick, or need to fish out that last combo piece, this card has got you covered.
Triumph of the Hordes: A finisher if there ever was one. This puppy can come out of nowhere and knock out an entire table in one fell swoop (dragon puns FTW).
Enchantments

The toolboxiest part of the deck, enchantments provide useful (and powerful) abilities for you and your field.
Animate Dead: Another piece of recursion, Animate Dead is most often seen paired with Worldgorger Dragon…but not here! It’s absolutely perfect for those moments when you need to pull an essential something back from beyond the veil.
Rhythm of the Wild: In a deck that can oftentimes be bogged down by that dreadful malaise known as summoning sickness *shudder*, it’s important to be able to get your dragons into the fight as soon as possible. However, if speed isn’t high on your priority list, you can also drop them in with an extra +1/+1 counter for later attacks.
Dragon Tempest: A bit restrictive, to be sure, but as most dragons have flying, rare is the time when they won’t be hitting as soon as they enter the battlefield. This card’s second ability, while useful, doesn’t come into play as much as one would hope, given that everyone points their removal directly at you.
Fires of Yavimaya: Haste for everybody! It’s just good. And its second ability gives Prossh that little extra boost over the finish line should he need it.
Garruk’s Uprising: While dragons are evasive by nature, occasionally you come up against an ideally matched opponent (looking at you, blue/white flyers). Trample gives them a way to still wreck face. Add to that the fact that it replaces itself and continually draws you cards, and this card looks better and better.
Crucible of Fire: What’s better than powerful dragons? Even powerfuller (evidently it is a word) dragons!
Creatures

The beating heart of the deck, the creatures are how we win. I’ll be subdividing them into three categories: mana dorks, utility creatures, and the dragons themselves. Here we go!
MANA DORKS:
Early game, these little guys let you start casting your dragons one, sometimes even two, turns ahead. Late game, they’re a little snack for our winged friends.
Llanowar Elves: The OG grandaddy of the mana dorks.
Elvish Mystic: Llanowar Elves’ younger brother.
Fyndhorn Elves: Their lesser known, but still just as good, cousin.
Whisperer of the Wilds: A little more expensive, but the benefits outweigh the costs when you realize that it almost always taps for two mana.
UTILITY CREATURES:
Providing big benefits in one form or another, these creatures help the dragons to realize their full potential.
Xenagos, God of Revels: Paired with Prossh, Xenagos spells death for at least one player at the table whenever he comes on the scene.
Purphoros, God of the Forge: When Prossh is cast, even if he’s countered, Purphoros deals 12 damage to every opponent if he is on the table. Pair him with Endrek Sahr, and things can get even more out of hand.
Endrek Sahr, Master Breeder: Prossh lite, he provides fuel for the dragon fires. When the thrulls are liberally devoured, Endrek Sahr can stick around much longer than he has any right to.

Pitiless Plunderer: Why stop with bonuses to combat damage? With this card on the field, you can ramp yourself into free dragons quite easily.
Azra Oddsmaker: Betting on the creatures with flying means you’re not really gambling at all. It’s usually a sure bet that at least one of them will get through.
Moraug, Fury of Akoum: Who doesn’t like extra combat? Turn those late game land draws to your advantage with this recent addition to the deck.
Ogre Battledriver: Though he may be a little on the mana heavy side, rare is the time that I regret playing this absolute beast of an enabler.
Kediss, Emberclaw Familiar: While he may not have been made with Prossh in mind, he has still tabled entire play groups when combined with Prossh and Xenagos.
DRAGONS:
Last, but by no means least, the reason we’re all here. Selected from the choice offerings throughout MTG’s history, I present the cream of the crop. Drum roll, please…
Predator Dragon: Kicking things off, we’ve got a 4/4 flying, haste, with Devour 2. If Prossh ever gets bogged down under the weight of counters and removal, this guy can easily pick up the slack by smashing through for big damage.
Kilnmouth Dragon: An oldie-but-goldie, this dragon is on the expensive end of the curve, but even having two dragons in your hand means he comes down as an 11/11 flyer with a not insignificant tap ability.
Darigaaz Reincarnated: Practically impossible to remove—short of exile—once this guy hits the field, he’s there for good. Add flying, trample, and haste to a 7/7 body and we’re really cooking with gas.

Vaevictis Asmadi, the Dire: Counterspell bait if there ever was one, this dragon can singlehandedly alter the course of a game if he sticks around for even one turn. His ability, which triggers on attack, gets around indestructible, which means those pesky Theros gods can go right in the graveyard.
Steel Hellkite: It’s a thing for a reason. Activating its second ability, even for zero, completely shuts down token strategies of all types. Doing it for two or three hits most mana rocks. Anything after that is just gravy.
Dragon Broodmother: If Verdant Force was a pissed off dragon, it would look exactly like this card. Able to pump out sac fodder at an obscene rate, one full turn around a standard table nets you four dragons to do with as you see fit.
Nesting Dragon: You’re going to be playing lands; a lot of them. Why not take advantage and essentially create two creatures with a single landfall trigger? Leverage them for Prossh, or hold them back for chump blockers, either way, you won’t be disappointed.
Wasitora, Nekoru Queen: One of my personal favorites (those Cat Dragon tokens, amirite?), but unfortunately one of the weaker choices here. Early game, she provides great value, and can seriously slow your opponents down. Late game, however, she just doesn’t do enough to justify a permanent slot on this list.
Boltwing Marauder: Kind of a dark horse in the dragon world, it can seriously pump up Prossh or another dragon once tokens start slamming onto the field.
Scourge of the Throne: A force to be reckoned with, most players will do anything they can to ensure that it can’t even get a single attack trigger in.

Korvold, Fae-Cursed King: Value incarnate, Korvold leverages exactly what Prossh wants to do and turns it into pure card advantage.
Kolaghan, the Storm’s Fury: At first glance, Kolaghan doesn’t seem particularly good, until you realize that four dragons attacking (assuming they’re only base 4/4) makes every single one of them now 8/4s. It is a threat that must be answered.
Dragonlord Kolaghan: While its second ability is less than useless in our format, a 6/5 flying, haste that gives every other creature haste is a powerful little gem that can come out of nowhere for big damage.
Savage Ventmaw: It basically reads “cast Prossh for a Swamp.”
Bladewing the Risen: With so many threats, this deck tends to attract board wipes and removal. It may be over-costed for what it does, but nothing feels better than bringing back a dragon your opponent thought they didn’t have to worry about anymore. The 4/4 flying body is just the cherry on top.
Terror of the Peaks: Fast becoming a household name (justifiably so), Terror of the Peaks takes the high-power stats inherent in this deck and turns them into direct damage that can hit anything.
Atarka, World Render: A two card combo with Prossh, a resolved Atarka spells death for one unlucky individual at any table.
Prossh, Skyraider of Kher: You know him, you love him, you hate to see him pointing in your direction. A Tier-1 commander since he was first printed, Prossh generates value simply by being cast. Where most players hate the command tax, a player piloting a Prossh deck welcomes the opportunity to create more minions for the commander to feast on.
And that’s the list. Below we’ll be going over some general concepts to bear in mind when piloting this deck.
Strategies
Constructed as an “all-rounder,” this build has exceptional explosive potential. It excels at single-target destruction and attacking from what would normally be considered “off-angles”—i.e., out of nowhere. A board presence of two or three dragons becomes a hammer blow by the casting of a single card. It can also slow roll into a sizable board state, leaving your opponents to wonder what the hell happened.
This means that everyone will be watching you out of the corners of their eyes. So the question becomes: How do you play the deck?
Don’t dump your hand. Cast a dragon here, a dragon there, spread the damage around, drop everyone’s life totals. Always hold something back for the inevitable board wipes. This gives you resiliency and keeps the target off your back until you’re ready to knock everyone out.
As shameful as Sarkhan Vol would find it, you can’t just attack and attack. You’ve got to play the politics that are intrinsic in our format. As satisfying as it is to windmill-slam three dragons and knock a player out in one turn, if you want to win the game, you’ve got to play it close to the vest.
Synergies

Aside from the obvious Prossh, Xenagos, and Kediss combo, there isn’t anything that can table a playgroup. This is by design.
As with any well-constructed Commander deck, there are numerous synergies that can be exploited. Below, I’ll list some of the ones that I’ve found most relevant as I’ve fine-tuned the deck.
Boltwing Marauder 🡪 Endrik Sahr/Prossh: This combination can create a simply massive attacker out of nowhere. In many cases, the attacking creature is swinging in for half a life total.
Prossh 🡪 Pitiless Plunderer: Sacrificing your tokens to Prossh nets you mana to hold in reserve or spend immediately to cast even more dragons.
Nesting Dragon 🡪 Descent of the Dragons: A little combo I’ve used several times to generate big 4/4 dragons as well as little 2/2 dragons. If Boltwing Marauder is on the field, it gets even more ridiculous. Two triggers of +2/+0 for every dragon egg that is destroyed.
Purphoros, God of the Forge 🡪 Endrek Sahr and Prossh: Just massive damage. If you’ve already cast Prossh once before, this little combo deals 34 damage to each and every player.
Savage Ventmaw 🡪 Bladewing the Risen 🡪 Any dragon in your graveyard: A two-dragon swing for the low, low price of two black mana.
Terror of the Peaks 🡪 Any dragon in the deck: Simple enough. With a curve on the higher end, this deck needs to grab value wherever it can. Terror of the Peaks ensures that the gravy train keeps rolling.
While Prossh, as a commander, is well-suited to cEDH combo, I decided to take a different track and bring in some of his brothers-in-arms. It may not be top tier, but it’s still one of the most effective and fun decks I’ve ever created; not to mention one of the longest-lasting.
I hope you’ve enjoyed my little primer, and that, even if you decide this isn’t the deck for you, it sparked those creative embers that’ll get you brewing your own version.
Thanks for reading, and I’ll see you on the battlefield!


Commander (1)
Prossh, Skyraider of Kher
Creature (29)
1x Atarka, World Render
1x Azra Oddsmaker
1x Bladewing, the Risen
1x Boltwing Marauder
1x Darigaaz Reincarnated
1x Dragon Broodmother
1x Dragonlord Kolaghan
1x Elvish Mystic
1x Endrek Sahr, Master Breeder
1x Fyndhorn Elves
1x Kediss, Emberclaw Familiar
1x Kilnmouth Dragon
1x Kolaghan, the Storm’s Fury
1x Korvold, Fae-Cursed King
1x Llanowar Elves
1x Moraug, Fury of Akoum
1x Nesting Dragon
1x Ogre Battledriver
1x Pitiless Plunderer
1x Predator Dragon
1x Purphoros, God of the Forge
1x Savage Ventmaw
1x Scourge of the Throne
1x Steel Hellkite
1x Terror of the Peaks
1x Vaevictus Asmadi, the Dire
1x Wasitora, Nekoru Queen
1x Whisperer of the Wilds
1x Xenagos, God of Revels
Enchantment (6)
1x Animate Dead
1x Crucible of Fire
1x Dragon Tempest
1x Fires of Yavimaya
1x Garruk’s Uprising
1x Rhythm of the Wild
Artifact (4)
1x Golgari Signet
1x Gruul Signet
1x Rakdos Signet
1x Sol Ring
Instant (5)
1x Assassin’s Trophy
1x Beast Within
1x Heroic Intervention
1x Hunter’s Insight
1x Nature’s Claim
Sorcery (18)
1x Crux of Fate
1x Cultivate
1x Decimate
1x Descent of the Dragons
1x Eldritch Evolution
1x Explosive Vegetation
1x Farseek
1x Growth Spasm
1x Kodama’s Reach
1x Maelstrom Pulse
1x Mogg Infestation
1x Rampant Growth
1x Read the Bones
1x Reanimate
1x Shamanic Revelation
1x Three Visits
1x Triumph of the Hordes
1x Victimize
Land (37)
1x Blood Crypt
1x Bloodstained Mire
1x Bojuka Bog
1x Command Tower
1x Darigaaz’s Caldera
1x Dragonskull Summit
1x Fabled Passage
5x Forest
1x Haven of the Spirit Dragon
1x Karplusan Forest
1x Kessig Wolf Run
1x Llanowar Wastes
5x Mountain
1x Overgrown Tomb
1x Rootbound Crag
1x Savage Lands
1x Stomping Ground
1x Sulfurous Springs
4x Swamp
1x Temple of Abandon
1x Temple of Malady
1x Temple of Malice
1x Verdant Catacombs
1x Westvale Abbey
1x Wooded Foothills
1x Woodland Cemetery

Longtime Timmy player, A.J. Sobel started playing Magic during the New Phyrexia block. Though he’s dabbled in numerous archetypes across the color wheel, he always seems to come back to the simplicity of tribal in all its forms. A.J. is also a published author and enjoys working on various writing projects.
His first novel, Empire, is a dark tale of magic, greed, and corruption, set against the backdrop of the late 19th century.
His second full-length work, Veil, releases February 16th in both paperback and on Amazon Kindle!
Check him out on Amazon: www.amazon.com/author/ajsobel
Get in touch with him on Facebook: www.facebook.com/authorajsobel
Comentários